Easy Garlic Breadsticks Delicious and Simple Recipe

WANT TO SAVE THIS RECIPE?

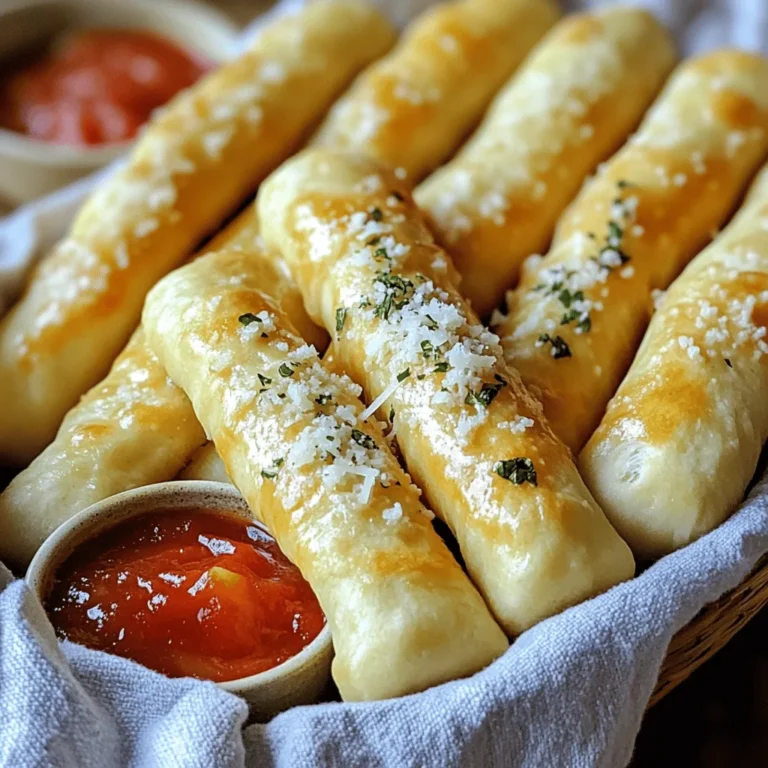
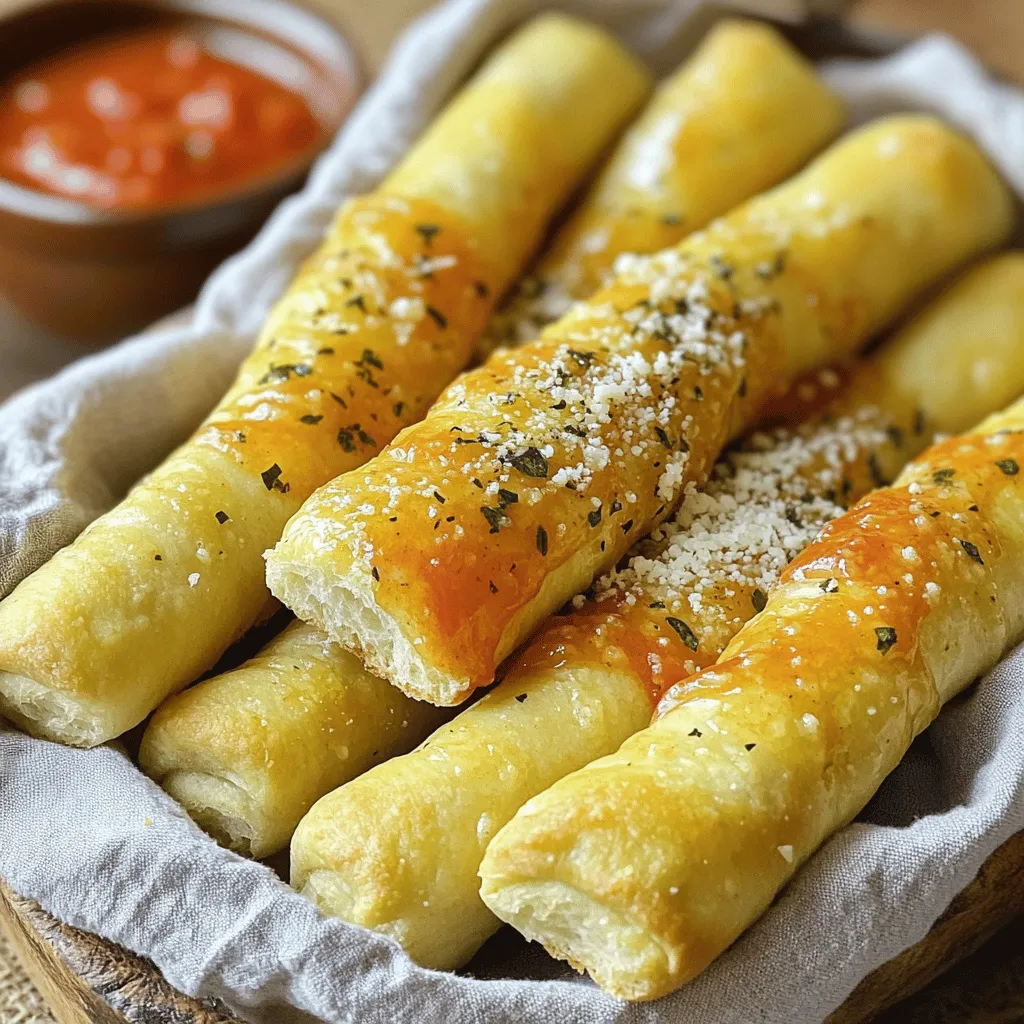
Looking for a quick snack or side dish that packs a punch of flavor? You’re in the right place! In this post, I’ll show you how to make Easy Garlic Breadsticks that are both delicious and simple. With just a few common ingredients, like pizza dough and garlic, you can whip up these tasty treats in no time. Whether you enjoy them with marinara or straight from the oven, these breadsticks will please your palate!

Ingredients

Main Ingredients

To make easy garlic breadsticks, you need a few key items. These are:

– 1 can (13.8 oz) refrigerated pizza dough

– 4 tablespoons unsalted butter, melted

– 4 cloves garlic, minced

– 1 teaspoon dried oregano

– 1 teaspoon dried parsley

– 1/2 teaspoon salt

– 1/4 teaspoon black pepper

The refrigerated pizza dough is the base of your breadsticks. It saves time and gives great texture. The unsalted butter adds richness and flavor. Garlic brings that classic taste, while herbs like oregano and parsley add freshness. The salt and pepper round out the flavors perfectly.

Optional Ingredients

You can also boost the flavor with extra ingredients. Consider these:

– Grated Parmesan cheese for topping

– Additional seasoning options

Parmesan cheese adds a savory touch on top of your breadsticks. You can also try adding red pepper flakes for some heat or Italian seasoning for more flavor. The options are endless, so feel free to get creative!

For the full recipe, check out the detailed instructions.

Step-by-Step Instructions

Preparation Steps

First, you need to preheat your oven to 400°F (200°C). This step is key for even baking. While the oven heats, prepare your baking sheets. Line them with parchment paper. This helps keep the breadsticks from sticking. Next, roll out the pizza dough. Place it on a lightly floured surface. Aim for a rectangle that is about 1/2 inch thick. This thickness gives you a nice, fluffy breadstick.

Mixing the Garlic Butter

Now it’s time to make the garlic butter. In a small bowl, combine the melted butter with minced garlic, oregano, parsley, salt, and black pepper. Mix everything until it’s well blended. This garlic butter will give your breadsticks a rich flavor. Make sure to taste it! You want to ensure the seasoning is just right.

Shaping and Baking

Next, cut the dough into strips. Each strip should be about 1 inch wide. Use a sharp knife or a pizza cutter for clean cuts. After that, take your garlic butter mixture. Brush it generously over each strip. Make sure every piece is well coated. If you want, sprinkle some grated Parmesan cheese on top for extra flavor.

Place the breadsticks on your lined baking sheet. Space them about an inch apart. This allows them to bake evenly. Now, bake your breadsticks in the preheated oven for about 12-15 minutes. Keep an eye on them. You want them golden brown and cooked through. Once done, remove them from the oven. Let them cool for a few minutes before serving. Enjoy your delicious garlic breadsticks! For the complete method, check the Full Recipe.

Tips & Tricks

Perfecting Garlic Breadsticks

To cut the dough, use a sharp knife or pizza cutter. Cut the dough into strips that are about 1-inch wide. This size helps them bake evenly. If you want a more rustic look, you can even tear the dough by hand.

For even baking, space the breadsticks about an inch apart on the baking sheet. This allows hot air to circulate around them. Make sure your oven is fully preheated before you bake. This step is key for getting a nice golden color on your breadsticks.

Serving Suggestions

Marinara sauce pairs perfectly with these garlic breadsticks. You can serve it warm in a small bowl for dipping. This adds a fun touch and enhances the flavor.

For presentation, arrange the warm breadsticks in a tall glass for a stylish look. You can also use a basket lined with a cloth. This gives a cozy feel to your meal. If you want a little extra flair, drizzle olive oil infused with garlic over the breadsticks before serving.

For the full details on making these delicious breadsticks, check out the Full Recipe.

Variations

Different Flavor Options

You can make your garlic breadsticks even more tasty by adding cheese or herbs. Grated Parmesan cheese elevates the flavor and gives a nice finish. Just sprinkle it on top before baking. You can also try mixing in different herbs. Basil, thyme, or rosemary can bring a new twist.

If you love heat, try spicy garlic breadsticks. Just add red pepper flakes to your garlic butter mix. This adds a kick that makes the breadsticks stand out. You can adjust the amount based on how spicy you like it.

Alternative Dough Options

If you’re looking for healthier options, use whole wheat or gluten-free dough. Whole wheat dough packs more fiber and nutrients. It gives a nutty flavor that pairs well with garlic. For gluten-free, choose a dough made from rice or almond flour. This way, everyone can enjoy these breadsticks, regardless of dietary needs.

For a full recipe, check the Easy Garlic Breadsticks section. Enjoy experimenting with these variations!

Storage Info

Storing Leftovers

To store your leftover garlic breadsticks, let them cool completely. Then, wrap them tightly in plastic wrap or aluminum foil. This keeps them fresh and prevents them from drying out. You can also place them in an airtight container. Store them in the fridge for up to three days. If you want to keep them longer, you can freeze them. Just make sure they are well wrapped. They can last in the freezer for up to three months.

Reheating Tips

For the best taste, reheat your garlic breadsticks in the oven. Preheat your oven to 350°F (175°C). Place the breadsticks on a baking sheet. Cover them loosely with foil to keep them soft. Heat for about 10 minutes, or until they are warm. You can also microwave them for a quick fix. Just place them on a plate and heat for 15-20 seconds. Be careful not to overheat, or they may become tough. Enjoy them warm and fresh! For the full recipe, check out Easy Garlic Breadsticks.

FAQs

How to make garlic breadsticks from scratch?

To make garlic breadsticks from scratch, start with refrigerated pizza dough. Preheat your oven to 400°F (200°C). Roll out the dough into a rectangle, about 1/2 inch thick. Cut it into strips, about 1 inch wide. Mix melted butter, minced garlic, oregano, parsley, salt, and pepper in a bowl. Brush this mixture over the strips. Place them on a baking sheet. Bake for 12-15 minutes until golden brown. For the full recipe, check the section above.

Can I freeze garlic breadsticks?

Yes, you can freeze garlic breadsticks. Allow them to cool completely after baking. Wrap each stick in plastic wrap or foil. Place them in a freezer-safe bag or container. They can stay in the freezer for up to three months. When ready to eat, thaw them in the fridge overnight. Reheat them in the oven at 350°F (175°C) for about 10 minutes.

What are some dipping sauces for garlic breadsticks?

Garlic breadsticks pair well with many dipping sauces. Here are a few tasty options:

– Marinara sauce

– Garlic-infused olive oil

– Ranch dressing

– Cheese sauce

– Pesto

Feel free to get creative and try your favorite sauces!

In this blog post, we explored how to make tasty garlic breadsticks using easy ingredients. We covered each step, from preparing the dough to baking it perfectly. I shared tips for great flavor and even baking. You can also try variations like cheese or spice to suit your taste. Don’t forget how to store and reheat your leftovers for the best experience. Now, you can enjoy warm garlic breadsticks any time. Grab your ingredients and start baking today!

To make easy garlic breadsticks, you need a few key items. These are: - 1 can (13.8 oz) refrigerated pizza dough - 4 tablespoons unsalted butter, melted - 4 cloves garlic, minced - 1 teaspoon dried oregano - 1 teaspoon dried parsley - 1/2 teaspoon salt - 1/4 teaspoon black pepper The refrigerated pizza dough is the base of your breadsticks. It saves time and gives great texture. The unsalted butter adds richness and flavor. Garlic brings that classic taste, while herbs like oregano and parsley add freshness. The salt and pepper round out the flavors perfectly. You can also boost the flavor with extra ingredients. Consider these: - Grated Parmesan cheese for topping - Additional seasoning options Parmesan cheese adds a savory touch on top of your breadsticks. You can also try adding red pepper flakes for some heat or Italian seasoning for more flavor. The options are endless, so feel free to get creative! For the full recipe, check out the detailed instructions. First, you need to preheat your oven to 400°F (200°C). This step is key for even baking. While the oven heats, prepare your baking sheets. Line them with parchment paper. This helps keep the breadsticks from sticking. Next, roll out the pizza dough. Place it on a lightly floured surface. Aim for a rectangle that is about 1/2 inch thick. This thickness gives you a nice, fluffy breadstick. Now it's time to make the garlic butter. In a small bowl, combine the melted butter with minced garlic, oregano, parsley, salt, and black pepper. Mix everything until it's well blended. This garlic butter will give your breadsticks a rich flavor. Make sure to taste it! You want to ensure the seasoning is just right. Next, cut the dough into strips. Each strip should be about 1 inch wide. Use a sharp knife or a pizza cutter for clean cuts. After that, take your garlic butter mixture. Brush it generously over each strip. Make sure every piece is well coated. If you want, sprinkle some grated Parmesan cheese on top for extra flavor. Place the breadsticks on your lined baking sheet. Space them about an inch apart. This allows them to bake evenly. Now, bake your breadsticks in the preheated oven for about 12-15 minutes. Keep an eye on them. You want them golden brown and cooked through. Once done, remove them from the oven. Let them cool for a few minutes before serving. Enjoy your delicious garlic breadsticks! For the complete method, check the Full Recipe. To cut the dough, use a sharp knife or pizza cutter. Cut the dough into strips that are about 1-inch wide. This size helps them bake evenly. If you want a more rustic look, you can even tear the dough by hand. For even baking, space the breadsticks about an inch apart on the baking sheet. This allows hot air to circulate around them. Make sure your oven is fully preheated before you bake. This step is key for getting a nice golden color on your breadsticks. Marinara sauce pairs perfectly with these garlic breadsticks. You can serve it warm in a small bowl for dipping. This adds a fun touch and enhances the flavor. For presentation, arrange the warm breadsticks in a tall glass for a stylish look. You can also use a basket lined with a cloth. This gives a cozy feel to your meal. If you want a little extra flair, drizzle olive oil infused with garlic over the breadsticks before serving. For the full details on making these delicious breadsticks, check out the Full Recipe. {{image_2}} You can make your garlic breadsticks even more tasty by adding cheese or herbs. Grated Parmesan cheese elevates the flavor and gives a nice finish. Just sprinkle it on top before baking. You can also try mixing in different herbs. Basil, thyme, or rosemary can bring a new twist. If you love heat, try spicy garlic breadsticks. Just add red pepper flakes to your garlic butter mix. This adds a kick that makes the breadsticks stand out. You can adjust the amount based on how spicy you like it. If you're looking for healthier options, use whole wheat or gluten-free dough. Whole wheat dough packs more fiber and nutrients. It gives a nutty flavor that pairs well with garlic. For gluten-free, choose a dough made from rice or almond flour. This way, everyone can enjoy these breadsticks, regardless of dietary needs. For a full recipe, check the Easy Garlic Breadsticks section. Enjoy experimenting with these variations! To store your leftover garlic breadsticks, let them cool completely. Then, wrap them tightly in plastic wrap or aluminum foil. This keeps them fresh and prevents them from drying out. You can also place them in an airtight container. Store them in the fridge for up to three days. If you want to keep them longer, you can freeze them. Just make sure they are well wrapped. They can last in the freezer for up to three months. For the best taste, reheat your garlic breadsticks in the oven. Preheat your oven to 350°F (175°C). Place the breadsticks on a baking sheet. Cover them loosely with foil to keep them soft. Heat for about 10 minutes, or until they are warm. You can also microwave them for a quick fix. Just place them on a plate and heat for 15-20 seconds. Be careful not to overheat, or they may become tough. Enjoy them warm and fresh! For the full recipe, check out Easy Garlic Breadsticks. To make garlic breadsticks from scratch, start with refrigerated pizza dough. Preheat your oven to 400°F (200°C). Roll out the dough into a rectangle, about 1/2 inch thick. Cut it into strips, about 1 inch wide. Mix melted butter, minced garlic, oregano, parsley, salt, and pepper in a bowl. Brush this mixture over the strips. Place them on a baking sheet. Bake for 12-15 minutes until golden brown. For the full recipe, check the section above. Yes, you can freeze garlic breadsticks. Allow them to cool completely after baking. Wrap each stick in plastic wrap or foil. Place them in a freezer-safe bag or container. They can stay in the freezer for up to three months. When ready to eat, thaw them in the fridge overnight. Reheat them in the oven at 350°F (175°C) for about 10 minutes. Garlic breadsticks pair well with many dipping sauces. Here are a few tasty options: - Marinara sauce - Garlic-infused olive oil - Ranch dressing - Cheese sauce - Pesto Feel free to get creative and try your favorite sauces! In this blog post, we explored how to make tasty garlic breadsticks using easy ingredients. We covered each step, from preparing the dough to baking it perfectly. I shared tips for great flavor and even baking. You can also try variations like cheese or spice to suit your taste. Don't forget how to store and reheat your leftovers for the best experience. Now, you can enjoy warm garlic breadsticks any time. Grab your ingredients and start baking today!

Easy Garlic Breadsticks

Satisfy your cravings with these easy garlic breadsticks that are perfect for any meal! With just a few simple ingredients like refrigerated pizza dough, garlic, and butter, you can whip up a batch in under 20 minutes. These golden, buttery sticks pair perfectly with marinara sauce or garlic oil for dipping. Don’t miss out on this delicious recipe – click through to explore how you can make these amazing garlic breadsticks at home!

Ingredients
  

1 can (13.8 oz) refrigerated pizza dough

4 tablespoons unsalted butter, melted

4 cloves garlic, minced

1 teaspoon dried oregano

1 teaspoon dried parsley

1/2 teaspoon salt

1/4 teaspoon black pepper

Optional: Grated Parmesan cheese for topping

Instructions
 

Preheat your oven to 400°F (200°C).

    Roll out the pizza dough onto a lightly floured surface into a rectangle approximately 1/2 inch thick.

      Cut the dough into strips, about 1-inch wide, with a sharp knife or pizza cutter.

        In a small bowl, mix the melted butter, minced garlic, oregano, parsley, salt, and pepper together until well combined.

          Brush the garlic butter mixture generously over each breadstick strip, ensuring they are coated evenly.

            For additional flavor, sprinkle grated Parmesan cheese on top of the buttered strips if desired.

              Place the breadsticks on a baking sheet lined with parchment paper, spacing them about an inch apart.

                Bake in the preheated oven for 12-15 minutes or until golden brown and cooked through.

                  Remove from the oven and let cool for a few minutes before serving.

                    Prep Time, Total Time, Servings: 10 minutes | 20 minutes | Serves 4

                      - Presentation Tips: Arrange the warm breadsticks in a tall glass or a basket lined with a clean cloth for a rustic look. Serve with marinara sauce or a side of garlic-infused olive oil for dipping.

                        WANT TO SAVE THIS RECIPE?

                        Leave a Comment

                        Recipe Rating