Craving a sweet treat that’s both rich and easy to make? Join me as we dive into the world of No-Bake Chocolate Cheesecake. This simple dessert is perfect for all skill levels and will impress your friends and family. With a creamy filling and a crunchy crust, this cheesecake is a surefire hit at any gathering. Let’s get started on creating this delightful chocolate experience together!
Ingredients
To create a no-bake chocolate cheesecake, you need a few simple ingredients. These will make both the crust and the filling rich and delightful.
List of Ingredients
– For the crust:
– 1 ½ cups graham cracker crumbs
– ½ cup unsweetened cocoa powder
– ¼ cup granulated sugar
– ½ cup unsalted butter, melted
– For the filling:
– 16 oz cream cheese, softened
– 1 cup powdered sugar
– 1 cup heavy whipping cream
– ½ cup semi-sweet chocolate chips, melted
– 1 teaspoon vanilla extract
– Pinch of salt
Optional toppings and decorations
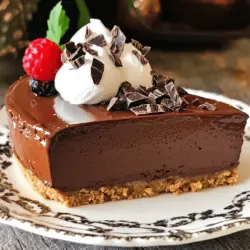
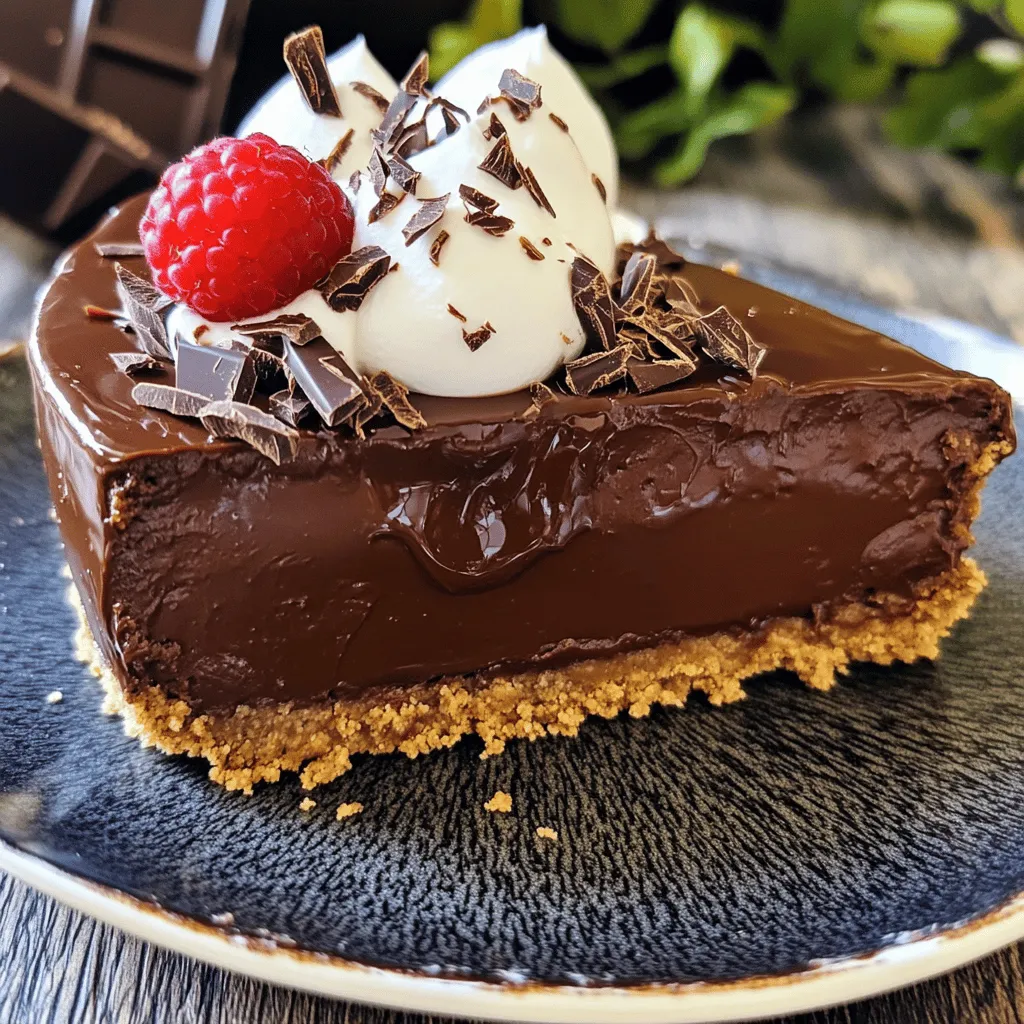
You can add a touch of flair with some chocolate shavings or whipped cream on top. Fresh berries also look great and add color. These little details make your cheesecake even more appealing.
This no-bake chocolate cheesecake is a simple yet impressive dessert.
Step-by-Step Instructions
Preparing the Crust
To start, gather your ingredients for the crust. You will need:
– 1 ½ cups graham cracker crumbs
– ½ cup unsweetened cocoa powder
– ¼ cup granulated sugar
– ½ cup unsalted butter, melted
In a mixing bowl, combine the graham cracker crumbs, cocoa powder, and sugar. Mix these dry ingredients well. Then, add the melted butter to the bowl. Stir until the mixture feels like wet sand. This will help form a sturdy crust.
Next, press this crumb mixture firmly into the bottom of a 9-inch springform pan. Make sure it is even and compact. Once done, place the crust in the fridge to chill while you prepare the filling.
Making the Filling
Now it’s time for the filling. You will need:
– 16 oz cream cheese, softened
– 1 cup powdered sugar
– ½ cup semi-sweet chocolate chips, melted
– 1 teaspoon vanilla extract
– Pinch of salt
In a clean bowl, beat the softened cream cheese until it is smooth. Gradually add the powdered sugar while mixing. This helps to keep the filling creamy. Next, fold in the melted chocolate, vanilla extract, and a pinch of salt. Mix until everything is smooth and chocolatey.
Combining and Chilling
For a light and fluffy texture, you will need:
– 1 cup heavy whipping cream
In another bowl, whip the heavy cream until stiff peaks form. This means the cream should hold its shape well. Gently fold the whipped cream into the chocolate cream cheese mixture. Be careful to mix without deflating the whipped cream.
Once combined, pour the chocolate filling over your cooled crust. Use a spatula to spread it evenly. Cover the cheesecake with plastic wrap and refrigerate it for at least 4 hours, or overnight. This chilling time helps the cheesecake set perfectly.
Tips & Tricks
Perfecting the Texture
To get a creamy filling, always start with softened cream cheese. This helps it blend well. Mix slowly when adding powdered sugar, and don’t rush. Folding in the whipped cream gently keeps it light and airy. For a smooth texture, make sure all ingredients are at room temperature.
For the crust to hold together, press it firmly into the pan. Use a flat-bottomed glass to pack it down. The melted butter helps bind the crumbs. Let the crust chill in the fridge. This ensures it sets well before adding the filling.
Decorating the Cheesecake
Decorating adds fun! Top your cheesecake with whipped cream for a fluffy touch. Chocolate shavings or curls make it look fancy. You can also sprinkle some cocoa powder on top for extra flavor. Serve each slice with fresh berries for a splash of color. This makes your dessert pop on the plate!
Time-saving Tips
Prepare components ahead of time. You can make the crust and filling a day in advance. Keep them in the fridge until you’re ready to assemble. For quick ingredient swaps, use store-bought whipped topping instead of whipping cream. It saves time and still tastes great!
Variations
Flavor Additions
You can make this cheesecake even more fun by adding fruits or liqueurs. Fresh fruits like raspberries or strawberries give a nice tartness. They also add a pop of color on top. Simply place some berries on the cheesecake before serving. The sweet and sour mix is delightful.
If you want an adult twist, consider adding a splash of liqueur. I like using coffee or orange liqueur for extra depth. Just mix a few tablespoons into the filling. This small change can take your cheesecake to a whole new level.
Dietary Adjustments
Want to make the cheesecake gluten-free? Swap the graham cracker crumbs for almond flour or gluten-free cookies. Both options work well to create a tasty crust. Just make sure to check the labels for gluten-free certification.
If you follow a vegan diet, you can still enjoy this dessert. Use plant-based cream cheese and coconut cream instead of heavy whipping cream. Replace butter with coconut oil or vegan margarine. The flavors will still shine through, and your guests will love it.
Storage Info
How to Store Leftovers
To keep your no-bake chocolate cheesecake fresh, store leftovers in the fridge. Use a tight lid or plastic wrap to cover the cheesecake. This prevents it from absorbing other smells. You can keep it in the fridge for up to five days. If you want to keep it longer, freezing is a great option.
Freezing the Cheesecake
To freeze your cheesecake, first make sure it is fully set. Wrap it well in plastic wrap. Then, place it in a freezer-safe container. This helps avoid freezer burn. You can freeze the cheesecake for up to three months.
When you’re ready to enjoy it again, take it out of the freezer. Let it thaw in the fridge overnight. This slow thaw keeps the texture creamy. If you need it sooner, you can thaw it at room temperature for about two hours. It’s best not to rush this process to keep the flavors intact.
FAQs
Can I make this cheesecake ahead of time?
Yes, you can make this cheesecake ahead of time. I suggest preparing it a day before serving. This gives the cheesecake plenty of time to chill and set well. You want it cold and firm for the best slice. Just cover it tightly with plastic wrap and store it in the fridge. When it’s time to serve, it will be ready for your guests!
What can I substitute for cream cheese?
If you want a different flavor, you can use mascarpone cheese. It gives a nice, creamy texture. Another option is Greek yogurt, which adds a tangy taste. You can also use silken tofu for a dairy-free choice. This option is great if you want a vegan cheesecake. Each alternative will change the taste a bit, but they all work well!
How do I know when the cheesecake is set?
You will know the cheesecake is set when it feels firm to the touch. Press gently in the center; it should spring back slightly. The edges will look solid, but the center may be a bit soft. After chilling, check for a slight jiggle in the middle. That means it’s ready to slice and serve!
Making this cheesecake is simple and fun. We covered all the steps, from the crust to the filling. You learned how to tweak the recipe for your tastes and dietary needs. Remember, you can store leftovers well or freeze them for later.
Try different flavor ideas and toppings to impress your friends and family. With these tips, you’ll become a cheesecake master in no time. Enjoy your delicious creation and share it with those you love!