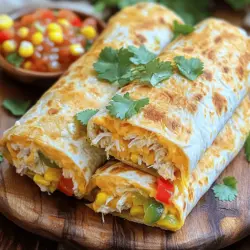
Looking for a quick and tasty meal? Cheesy Chicken Wraps are your answer! With gooey cheese and seasoned chicken, these wraps are both flavorful and fun to make. You can customize them easily to fit your taste. In this post, I’ll guide you through simple steps, tips, and variations. Let’s dive into the cheesy goodness that will make your next meal a hit!
Ingredients
Main Ingredients for Cheesy Chicken Wraps
To make cheesy chicken wraps, you need some key ingredients. Here’s what you will need:
– 2 boneless, skinless chicken breasts, cooked and shredded
– 1 cup shredded cheddar cheese
– 1 cup cream cheese, softened
– 1/2 cup diced bell peppers (any color)
– 1/2 cup corn (canned or frozen)
– 1 tablespoon taco seasoning
– 4 large flour tortillas
– 1/4 cup fresh cilantro, chopped (for garnish)
– Salt and pepper to taste
– Olive oil, for frying
These ingredients create a rich and tasty filling. The chicken provides protein, while the cheese adds creaminess.
Optional Ingredients for Extra Flavor
You can add some fun extras to make your wraps even better. Here are some ideas:
– Sliced jalapeños for heat
– Avocado or guacamole for creaminess
– Black beans for more texture
– Chopped green onions for a fresh kick
These options let you tailor the wraps to your taste. Feel free to mix and match based on what you have at home.
Suggestions for Substitutions
You can switch out some ingredients if needed. Here are some good swaps:
– Use turkey or tofu instead of chicken for a different protein.
– Try different cheeses like Monterey Jack or pepper jack.
– Use whole wheat or spinach tortillas for a healthier wrap.
These substitutions can help you use what you have on hand. They also add variety to your meals.
Step-by-Step Instructions
Preparation of Chicken and Filling
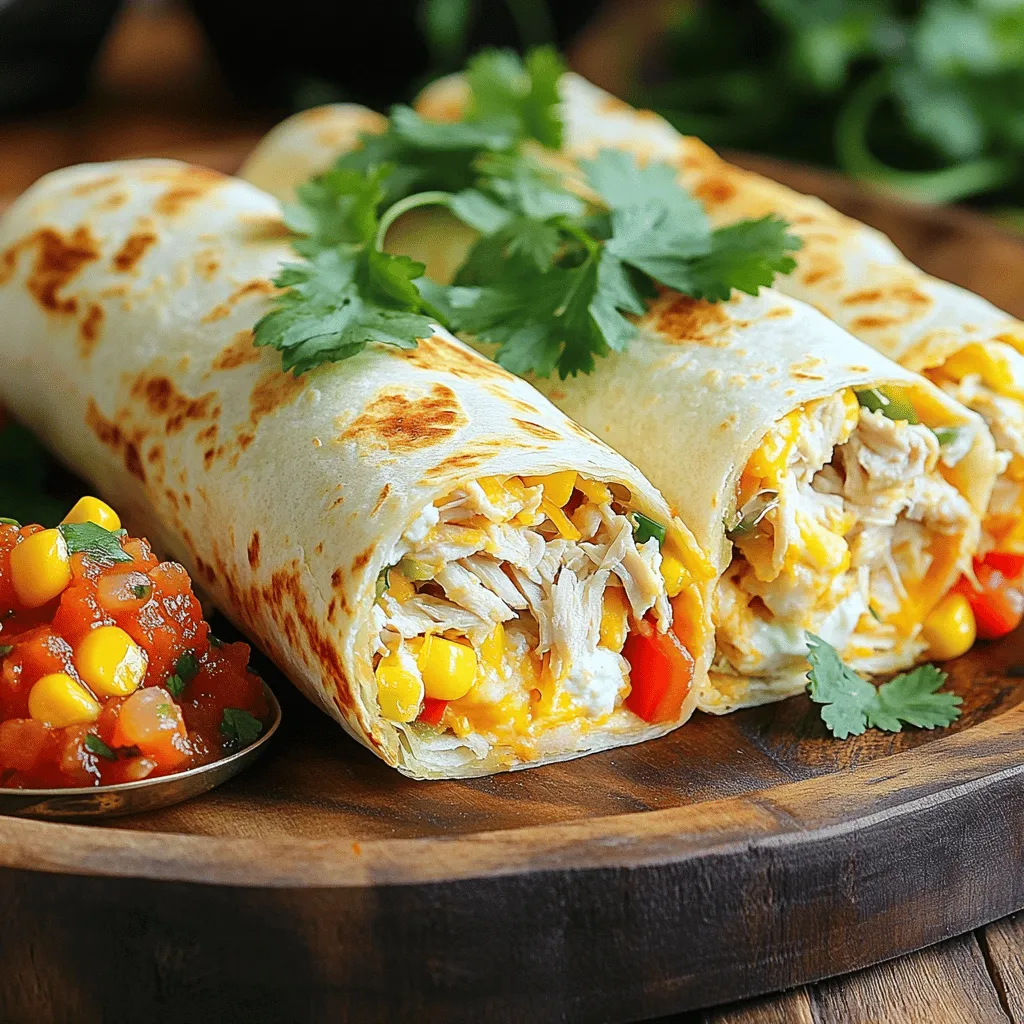
To start, you need cooked chicken. I like to use boneless, skinless chicken breasts. You can shred them easily with two forks. In a large bowl, mix the shredded chicken with one cup of shredded cheddar cheese. Add one cup of softened cream cheese for creamy goodness. Toss in half a cup of diced bell peppers—any color works! Then, add half a cup of corn, canned or frozen. Sprinkle in one tablespoon of taco seasoning. Don’t forget to add salt and pepper to taste. Mix everything well until it’s all combined.
Assembling the Wraps
Now, grab your large flour tortillas. Lay one flat on a clean surface. Spoon a good amount of the chicken mixture right in the center. Fold the sides of the tortilla in first. Then, roll it tightly from the bottom to the top. This keeps all that tasty filling inside. Repeat this process for the rest of the tortillas and filling.
Cooking the Wraps to Perfection
Next, heat a skillet over medium heat. Drizzle a bit of olive oil into the pan. Place the wrapped tortillas seam-side down in the skillet. Cook them for about 3 to 4 minutes on each side. You want them golden brown and crispy. Once they are done, take them out of the skillet. Let them rest for a minute before slicing each wrap in half. For a nice touch, sprinkle fresh chopped cilantro on top before serving.
Tips & Tricks
How to Make Perfectly Crispy Wraps
To get your wraps crispy, start with a hot skillet. Heat the skillet over medium heat before adding olive oil. Once the oil shimmers, place the wraps seam-side down. Cook them for 3-4 minutes on each side. This will give you that golden color and crunch you want. If you want extra crispiness, use a little more oil.
Flavor Enhancements and Seasoning Tips
Taco seasoning adds a nice kick. You can also try adding garlic powder or onion powder for more depth. A squeeze of lime juice over the filling gives a fresh taste. Experiment with spices like paprika or cumin to find your perfect blend. Don’t skip on salt and pepper; they make a big difference!
Ideal Pairings and Serving Suggestions
These cheesy chicken wraps pair well with salsa and guacamole. Serve them on a platter for parties or family meals. You can also add a side salad for a fresh touch. If you want to impress, sprinkle extra cheese on top before serving. It adds flavor and looks great! For a twist, try serving with a creamy ranch dip.
Variations
Different Cheese Options
You can mix up the cheese in your wraps. Use mozzarella for a stretchy melty bite. Try pepper jack for a spicy kick. Cream cheese adds a rich, smooth texture. You could even blend different cheeses for a unique taste. Each choice brings a new flavor to your wrap.
Alternative Protein Choices
If you want to switch the chicken, try ground turkey or beef. Shredded pork works well too. You can use canned tuna for a quick meal. For a smoky taste, add some bacon bits. Each protein option adds a different twist to your wraps.
Vegetarian and Vegan Adaptations
You can easily make these wraps vegetarian. Replace chicken with black beans or chickpeas. Use a mix of your favorite veggies, like zucchini or spinach. For vegan wraps, swap out cream cheese for cashew cream. Nutritional yeast can add a cheesy flavor without dairy. This way, you keep all the tasty goodness while catering to different diets.
Storage Info
How to Store Leftover Wraps
To store leftover wraps, first let them cool. Place them in an airtight container. You can also wrap them in plastic wrap. This keeps them fresh for up to three days in the fridge. If you want to keep them longer, freezing is a great option.
Reheating Instructions
When you are ready to eat, take the wraps out of the fridge. You can reheat them in a skillet over low heat. This helps to keep the wrap crispy. Heat each side for about three minutes. You can also use a microwave, but the wrap may get soft. Heat for about one minute, checking often.
Freezing Tips for Long-Term Storage
To freeze the wraps, wrap each one tightly in plastic wrap. Then place them in a freezer bag. Remove all the air to prevent freezer burn. You can freeze them for up to three months. When you are ready to eat, thaw them in the fridge overnight before reheating.
FAQs
Can I make Cheesy Chicken Wraps ahead of time?
Yes, you can prepare Cheesy Chicken Wraps ahead of time. Just make the filling and store it in the fridge. You can keep it for up to two days. When ready to eat, assemble the wraps and cook them. This way, you save time on busy days.
What other vegetables can I add to the wraps?
You can add many vegetables to your wraps. Some great options are:
– Spinach
– Zucchini
– Mushrooms
– Onions
– Tomatoes
These add extra flavor and nutrients. Feel free to mix and match your favorites!
How do I make these wraps healthier?
To make the wraps healthier, try these tips:
– Use whole wheat tortillas for more fiber.
– Add more veggies like spinach or bell peppers.
– Use low-fat cheese and cream cheese options.
– Substitute grilled chicken for shredded chicken.
These changes can enhance the taste and nutrition of your meal.
Cheesy chicken wraps are simple but delicious. You learned about key ingredients, how to prepare them, and cooking tips for the best results. I shared ways to store leftovers and delicious variations. You can experiment with different cheeses and proteins to suit your taste. Remember, wraps are easy to customize. Use these ideas to make your own tasty creations. Enjoy your time in the kitchen!