Chocolate Chip Cookie Skillet Irresistible Treat

WANT TO SAVE THIS RECIPE?

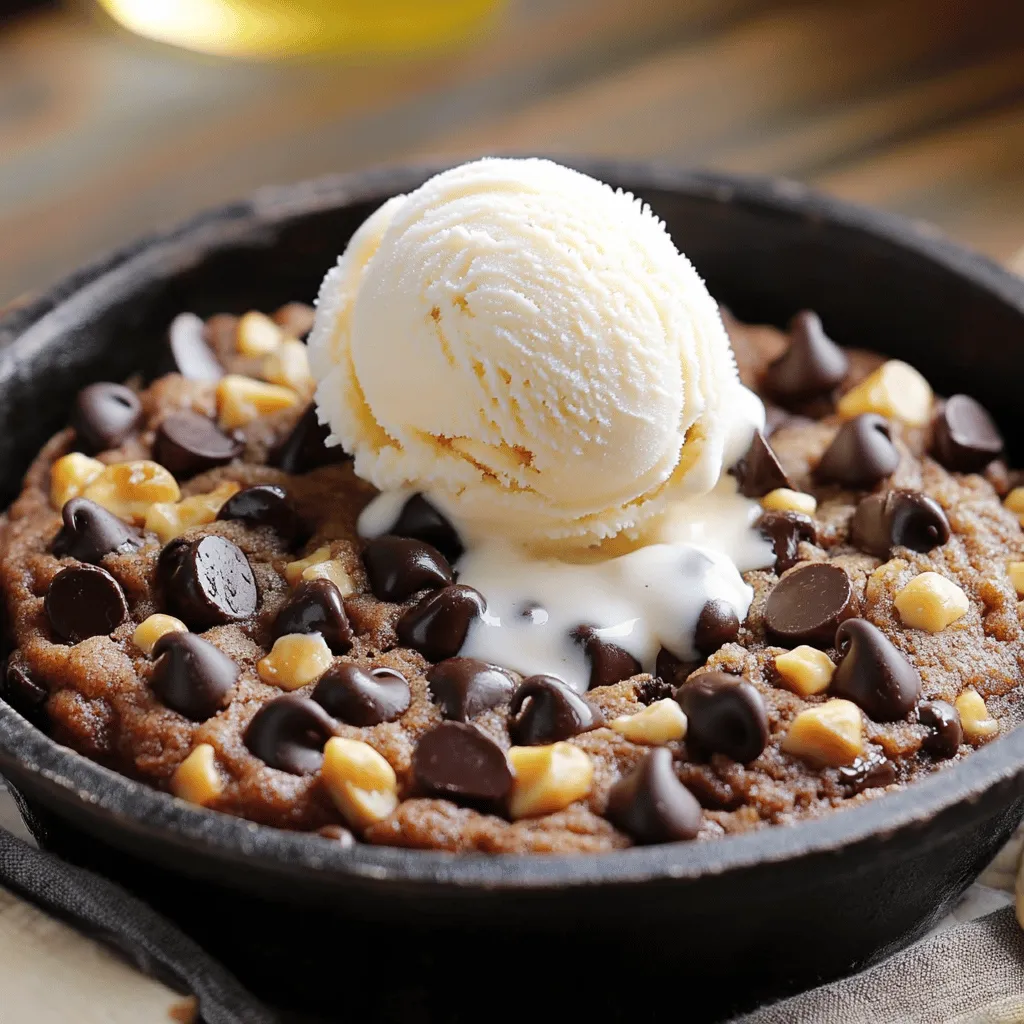
If you love warm, gooey cookies, then you’ve hit the jackpot! My Chocolate Chip Cookie Skillet is the ultimate treat, baked right in a skillet. With crispy edges and a soft center, this easy recipe satisfies any sweet tooth. Whether you want a late-night snack or a fun dessert for friends, I’ve got you covered. Let’s dive into the tasty world of cookie-making!

Ingredients

List of Ingredients

To make the Chocolate Chip Cookie Skillet, gather these simple ingredients:

– 1 cup unsalted butter, softened

– 1 cup brown sugar, packed

– 1/2 cup granulated sugar

– 2 large eggs

– 2 teaspoons vanilla extract

– 2 1/4 cups all-purpose flour

– 1 teaspoon baking soda

– 1/2 teaspoon salt

– 1 cup chocolate chips (semi-sweet or milk chocolate)

– 1/2 cup chopped nuts (optional, like walnuts or pecans)

– Vanilla ice cream for serving (optional)

Optional Ingredients

You can add some optional ingredients to make your cookie skillet even better. Here are a few:

– Chopped nuts for crunch

– Sea salt for a sweet and salty combo

– Peanut butter chips for extra flavor

Ingredient Substitutions

If you need to swap some ingredients, here are a few easy ideas:

– Use coconut oil instead of butter for a dairy-free option.

– Substitute brown sugar with coconut sugar for a different taste.

– For a gluten-free version, try almond flour or gluten-free all-purpose flour.

– You can replace eggs with flaxseed meal mixed with water for a vegan choice.

These options give you room to make the recipe your own. You can find the Full Recipe linked for easy reference. Each choice still leads to a delicious cookie skillet that everyone will love!

Step-by-Step Instructions

Preheat the Oven

First, set your oven to 350°F (175°C). This step ensures your cookie bakes evenly. A hot oven helps create a crispy top and a soft center.

Mixing Wet Ingredients

In a large bowl, blend the softened butter, brown sugar, and granulated sugar. Use an electric mixer to whip these until they are light and fluffy. This process takes about 2-3 minutes. Next, add the eggs one at a time. Mix well after each egg. Finally, stir in the vanilla extract, which adds great flavor.

Combining Dry Ingredients

Take another bowl and whisk together the all-purpose flour, baking soda, and salt. This mix is crucial. It makes sure the cookie rises well. Gradually add this dry mix to the wet ingredients. Stir just until combined. Be careful not to overmix. You want a soft dough.

Preparing the Skillet

Grab a large cast-iron skillet or any oven-safe skillet. Coat it lightly with butter or cooking spray. This step keeps the cookie from sticking. Pour the cookie dough into the skillet. Use a spatula to spread it evenly across the bottom.

Baking Process

Place your skillet in the oven. Bake for 25-30 minutes. Look for a golden brown top and slightly crispy edges. The center should feel soft but not raw. If you see that, it’s perfect!

Cooling and Serving Tips

After baking, take it out and let it cool for about 10 minutes. This cooling time helps the cookie set. For a special treat, serve it warm with a scoop of vanilla ice cream. It melts beautifully over the hot cookie. Enjoy this chocolate chip cookie skillet with friends and family! For the full recipe, check out the above section.

Tips & Tricks

Achieving the Perfect Texture

To get that soft, gooey center, do not overmix the dough. Mix until just combined. This keeps your cookie chewy. Pull it out of the oven when the edges are golden, and the center looks a bit soft. It will continue to cook as it cools.

Common Mistakes to Avoid

One common mistake is using cold butter. Always use softened butter for the best results. Another mistake is overbaking. Keep an eye on the cookie as it bakes. If you leave it in too long, it will be dry. Lastly, don’t skip the salt. It balances the sweetness.

How to Serve for Maximum Enjoyment

For a delicious treat, serve warm from the skillet. Top it with vanilla ice cream for extra sweetness. Ice cream melts into the cookie, making each bite a dream. You can also add chocolate sauce or caramel for more flavor. Enjoy it straight from the skillet for a fun vibe. To see the full recipe, check out the Chocolate Chip Cookie Skillet section above.

Variations

Different Chocolate Options

You can change the type of chocolate in your skillet. Use semi-sweet, milk, or dark chocolate chips. Each type gives a unique taste. You can also mix different kinds. Try adding white chocolate for a fun twist. The chocolate melts nicely and creates gooey pockets in your cookie.

Add-Ins: Nuts, Fruits, and More

Adding nuts like walnuts or pecans gives a nice crunch. You can also toss in dried fruits. Chopped cherries or cranberries add a sweet and tart flavor. If you like coconut, sprinkle some shredded coconut on top too. Each add-in makes the cookie more exciting and full of flavor.

Dietary Adjustments (Gluten-Free, Vegan Alternatives)

If you need a gluten-free option, use a gluten-free flour mix. This will still give you great texture. For a vegan version, replace eggs with flaxseed meal or applesauce. Use vegan butter and dairy-free chocolate chips. These changes keep the taste while fitting your dietary needs. Check out the Full Recipe for more details!

Storage Info

How to Store Leftovers

To keep your chocolate chip cookie skillet fresh, let it cool first. Use plastic wrap or foil to cover the skillet tightly. You can also transfer the cookies to an airtight container. Store it at room temperature for up to three days. If you want to keep it longer, refrigerate it for up to a week.

Reheating Instructions

When you’re ready to enjoy your cookie skillet again, preheat your oven to 350°F (175°C). Place the skillet in the oven for about 10 minutes. This will help warm it up and restore its soft texture. If you prefer, you can microwave a slice for about 20-30 seconds. Just make sure to check it to avoid overheating.

Freezing Options

If you want to save some for later, freezing is a great choice. Wrap the cooled skillet tightly in plastic wrap or foil. Then, place it inside a freezer-safe bag. It can last for up to three months in the freezer. When you want to eat it, let it thaw in the fridge overnight before reheating. Enjoy every bite of this delicious treat! For the full recipe, check above.

FAQs

Can I make this ahead of time?

Yes, you can prepare the cookie dough ahead of time. Store it in the fridge for up to 24 hours. Just remember to let it come to room temperature before baking.

How do I know when the cookie is done?

You can tell it’s done when the top is golden brown. The edges should be crispy, while the center remains soft. A toothpick inserted should come out with a few moist crumbs.

Can I use a different type of skillet?

Absolutely! You can use any oven-safe skillet. Just make sure it’s large enough to hold the dough. Cast iron gives the best results, but non-stick works too.

What should I do if the center is undercooked?

If the center is undercooked, return the skillet to the oven. Bake for an additional 5 to 10 minutes. Keep an eye on it to avoid overcooking the edges.

Can I double the recipe?

Yes, you can double the recipe! Just use a larger skillet and increase the baking time by a few minutes. Keep checking for that golden top.

What to serve with Chocolate Chip Cookie Skillet?

I love serving it warm with a scoop of vanilla ice cream. You can also add whipped cream or fresh berries for extra flavor. Enjoy every bite! For the full recipe, visit the recipe section above.

This blog post covered all you need for a tasty chocolate chip cookie skillet. We talked about ingredients, how to mix and bake, and even tips for great texture. You learned about fun variations and storage options to keep leftovers fresh.

Remember, cooking is all about trying new things. So, enjoy this treat and share it with others. Happy baking!

To make the Chocolate Chip Cookie Skillet, gather these simple ingredients: - 1 cup unsalted butter, softened - 1 cup brown sugar, packed - 1/2 cup granulated sugar - 2 large eggs - 2 teaspoons vanilla extract - 2 1/4 cups all-purpose flour - 1 teaspoon baking soda - 1/2 teaspoon salt - 1 cup chocolate chips (semi-sweet or milk chocolate) - 1/2 cup chopped nuts (optional, like walnuts or pecans) - Vanilla ice cream for serving (optional) You can add some optional ingredients to make your cookie skillet even better. Here are a few: - Chopped nuts for crunch - Sea salt for a sweet and salty combo - Peanut butter chips for extra flavor If you need to swap some ingredients, here are a few easy ideas: - Use coconut oil instead of butter for a dairy-free option. - Substitute brown sugar with coconut sugar for a different taste. - For a gluten-free version, try almond flour or gluten-free all-purpose flour. - You can replace eggs with flaxseed meal mixed with water for a vegan choice. These options give you room to make the recipe your own. You can find the Full Recipe linked for easy reference. Each choice still leads to a delicious cookie skillet that everyone will love! First, set your oven to 350°F (175°C). This step ensures your cookie bakes evenly. A hot oven helps create a crispy top and a soft center. In a large bowl, blend the softened butter, brown sugar, and granulated sugar. Use an electric mixer to whip these until they are light and fluffy. This process takes about 2-3 minutes. Next, add the eggs one at a time. Mix well after each egg. Finally, stir in the vanilla extract, which adds great flavor. Take another bowl and whisk together the all-purpose flour, baking soda, and salt. This mix is crucial. It makes sure the cookie rises well. Gradually add this dry mix to the wet ingredients. Stir just until combined. Be careful not to overmix. You want a soft dough. Grab a large cast-iron skillet or any oven-safe skillet. Coat it lightly with butter or cooking spray. This step keeps the cookie from sticking. Pour the cookie dough into the skillet. Use a spatula to spread it evenly across the bottom. Place your skillet in the oven. Bake for 25-30 minutes. Look for a golden brown top and slightly crispy edges. The center should feel soft but not raw. If you see that, it’s perfect! After baking, take it out and let it cool for about 10 minutes. This cooling time helps the cookie set. For a special treat, serve it warm with a scoop of vanilla ice cream. It melts beautifully over the hot cookie. Enjoy this chocolate chip cookie skillet with friends and family! For the full recipe, check out the above section. To get that soft, gooey center, do not overmix the dough. Mix until just combined. This keeps your cookie chewy. Pull it out of the oven when the edges are golden, and the center looks a bit soft. It will continue to cook as it cools. One common mistake is using cold butter. Always use softened butter for the best results. Another mistake is overbaking. Keep an eye on the cookie as it bakes. If you leave it in too long, it will be dry. Lastly, don’t skip the salt. It balances the sweetness. For a delicious treat, serve warm from the skillet. Top it with vanilla ice cream for extra sweetness. Ice cream melts into the cookie, making each bite a dream. You can also add chocolate sauce or caramel for more flavor. Enjoy it straight from the skillet for a fun vibe. To see the full recipe, check out the Chocolate Chip Cookie Skillet section above. {{image_2}} You can change the type of chocolate in your skillet. Use semi-sweet, milk, or dark chocolate chips. Each type gives a unique taste. You can also mix different kinds. Try adding white chocolate for a fun twist. The chocolate melts nicely and creates gooey pockets in your cookie. Adding nuts like walnuts or pecans gives a nice crunch. You can also toss in dried fruits. Chopped cherries or cranberries add a sweet and tart flavor. If you like coconut, sprinkle some shredded coconut on top too. Each add-in makes the cookie more exciting and full of flavor. If you need a gluten-free option, use a gluten-free flour mix. This will still give you great texture. For a vegan version, replace eggs with flaxseed meal or applesauce. Use vegan butter and dairy-free chocolate chips. These changes keep the taste while fitting your dietary needs. Check out the Full Recipe for more details! To keep your chocolate chip cookie skillet fresh, let it cool first. Use plastic wrap or foil to cover the skillet tightly. You can also transfer the cookies to an airtight container. Store it at room temperature for up to three days. If you want to keep it longer, refrigerate it for up to a week. When you’re ready to enjoy your cookie skillet again, preheat your oven to 350°F (175°C). Place the skillet in the oven for about 10 minutes. This will help warm it up and restore its soft texture. If you prefer, you can microwave a slice for about 20-30 seconds. Just make sure to check it to avoid overheating. If you want to save some for later, freezing is a great choice. Wrap the cooled skillet tightly in plastic wrap or foil. Then, place it inside a freezer-safe bag. It can last for up to three months in the freezer. When you want to eat it, let it thaw in the fridge overnight before reheating. Enjoy every bite of this delicious treat! For the full recipe, check above. Yes, you can prepare the cookie dough ahead of time. Store it in the fridge for up to 24 hours. Just remember to let it come to room temperature before baking. You can tell it's done when the top is golden brown. The edges should be crispy, while the center remains soft. A toothpick inserted should come out with a few moist crumbs. Absolutely! You can use any oven-safe skillet. Just make sure it’s large enough to hold the dough. Cast iron gives the best results, but non-stick works too. If the center is undercooked, return the skillet to the oven. Bake for an additional 5 to 10 minutes. Keep an eye on it to avoid overcooking the edges. Yes, you can double the recipe! Just use a larger skillet and increase the baking time by a few minutes. Keep checking for that golden top. I love serving it warm with a scoop of vanilla ice cream. You can also add whipped cream or fresh berries for extra flavor. Enjoy every bite! For the full recipe, visit the recipe section above. This blog post covered all you need for a tasty chocolate chip cookie skillet. We talked about ingredients, how to mix and bake, and even tips for great texture. You learned about fun variations and storage options to keep leftovers fresh. Remember, cooking is all about trying new things. So, enjoy this treat and share it with others. Happy baking!

- Chocolate Chip Cookie Skillet

Indulge in the ultimate dessert delight with this Chocolate Chip Cookie Skillet recipe! Perfectly baked in a cast-iron skillet, this gooey treat combines rich chocolate chips and buttery goodness for a melt-in-your-mouth experience. Easy to make and ideal for sharing, it's perfect for any occasion. Ready to satisfy your sweet tooth? Click through to get the full recipe and create this delicious masterpiece today!

Ingredients
  

1 cup unsalted butter, softened

1 cup brown sugar, packed

1/2 cup granulated sugar

2 large eggs

2 teaspoons vanilla extract

2 1/4 cups all-purpose flour

1 teaspoon baking soda

1/2 teaspoon salt

1 cup chocolate chips (semi-sweet or milk chocolate)

1/2 cup chopped nuts (optional, like walnuts or pecans)

Vanilla ice cream for serving (optional)

Instructions
 

Preheat your oven to 350°F (175°C).

    In a large mixing bowl, cream together the softened butter, brown sugar, and granulated sugar until light and fluffy using an electric mixer.

      Add the eggs one at a time, mixing well after each addition. Then incorporate the vanilla extract.

        In a separate bowl, whisk together the all-purpose flour, baking soda, and salt. Gradually add this dry mixture to the wet ingredients, mixing until just combined.

          Gently fold in the chocolate chips and chopped nuts (if using).

            Grease a large cast-iron skillet or an oven-safe skillet with a little butter or cooking spray.

              Pour the cookie dough into the skillet and spread it evenly with a spatula.

                Bake in the preheated oven for 25-30 minutes or until the top is golden brown and the edges are slightly crispy. The center should be soft but not raw.

                  Remove from the oven and let it cool for about 10 minutes before serving.

                    - Serve warm, optionally topped with a scoop of vanilla ice cream for a delightful treat!

                      Prep Time: 15 min | Total Time: 40-45 min | Servings: 8

                        WANT TO SAVE THIS RECIPE?

                        Leave a Comment

                        Recipe Rating