
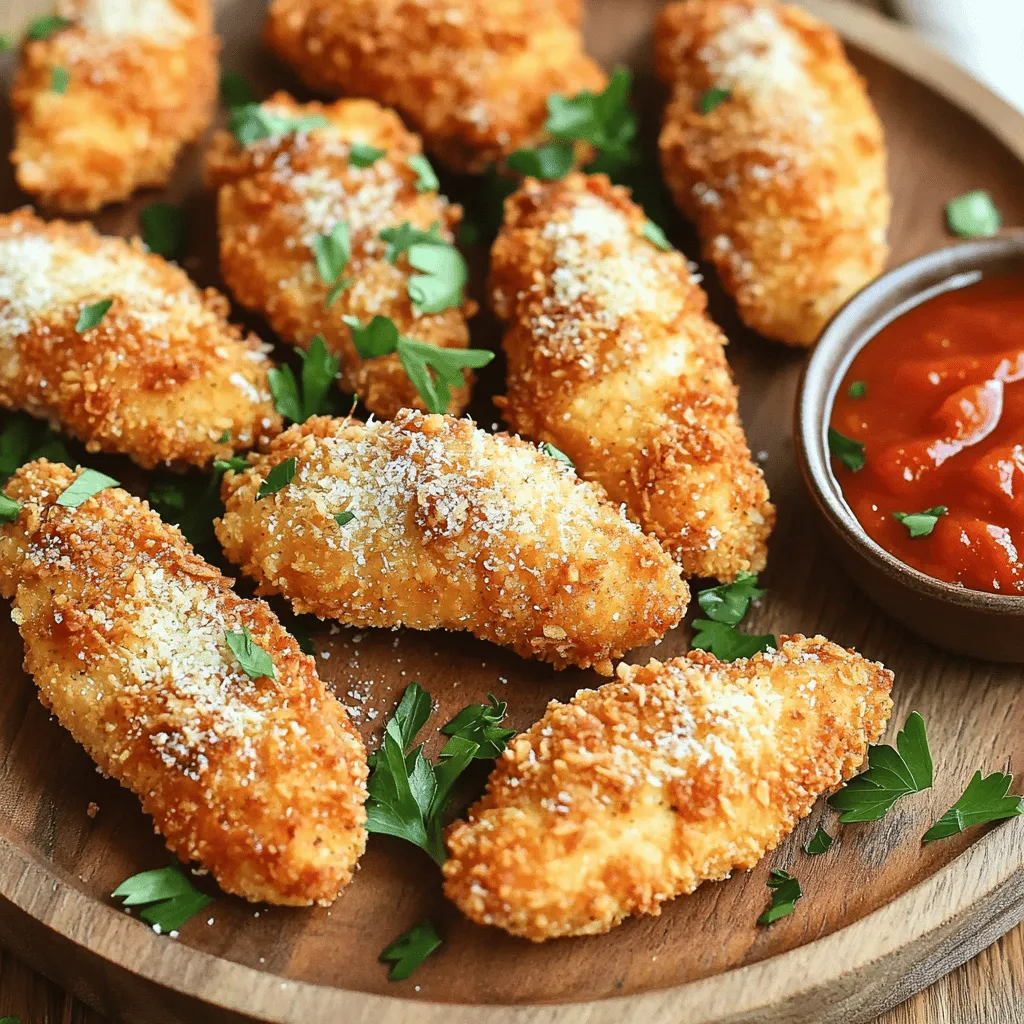
Get ready to crisp up your dinner with my Oven-Baked Crispy Parmesan Chicken Tenders! These tenders are easy to make and full of flavor. You’ll soak them in buttermilk, coat them in a tasty blend of spices and cheese, and bake them to golden perfection. This guide will help you nail every step, plus offer tips for crispiness and storage. Let’s dive in and make dinner a hit!
Ingredients
List of Ingredients
For Oven-Baked Crispy Parmesan Chicken Tenders, here are the ingredients you will need:
– 1 pound chicken tenderloins
– 1 cup buttermilk (or milk with a splash of lemon juice)
– 1 cup all-purpose flour
– 1 teaspoon garlic powder
– 1 teaspoon onion powder
– 1 teaspoon smoked paprika
– 1 cup grated Parmesan cheese
– 1 cup breadcrumbs (panko preferred for extra crunch)
– 1 teaspoon dried Italian herbs (oregano, basil, thyme)
– Salt and pepper to taste
– Olive oil spray
Ingredient Substitutions
You can easily swap some ingredients if needed:
– Buttermilk: Use regular milk with lemon juice.
– Breadcrumbs: Any type of breadcrumbs works, but panko gives the best crunch.
– Parmesan cheese: Grana Padano or Pecorino Romano are great substitutes.
– Herbs: Fresh herbs can replace dried ones. Just use more.
Cooking Essentials
To make this recipe, you will need some key tools:
– Baking sheet: Line it with parchment paper for easy cleanup.
– Shallow bowls: Use these for dredging the chicken.
– Whisk: Good for mixing dry ingredients.
– Spray bottle: Fill it with olive oil to mist the chicken for crispiness.
Following these guidelines will help you create the perfect crispy chicken tenders.
Step-by-Step Instructions
Prep: Buttermilk Soaking
Start by soaking the chicken tenderloins in buttermilk. This step is key. It helps to make the chicken juicy and flavorful. Let the chicken soak for at least 30 minutes. You can even go longer if you want. The acidity in the buttermilk helps tenderize the meat. If you don’t have buttermilk, mix regular milk with a splash of lemon juice. This works just as well.
Coating Preparation
While the chicken soaks, it’s time to prepare the coating. In a shallow dish, mix the flour with garlic powder, onion powder, smoked paprika, salt, and pepper. This spice mix gives the chicken great flavor. In another bowl, combine the grated Parmesan cheese with breadcrumbs and dried Italian herbs. Use panko breadcrumbs for extra crunch. Make sure to mix it well so every bite is tasty.
Baking Method
Once you’re ready, preheat your oven to 425°F (220°C). Line a baking sheet with parchment paper to prevent sticking. Take the chicken tenders out of the buttermilk, letting the excess drip off. Dredge each tender in the flour mixture first, then shake off any extra. Next, dip it into the Parmesan breadcrumb mix, pressing gently to coat well. Place the breaded tenders on the baking sheet. Lightly spray the tops with olive oil. This helps them get crispy in the oven. Bake for about 20-25 minutes. Look for a golden brown color and make sure the chicken is cooked through. Let them rest for a few minutes before serving. Enjoy your Oven-Baked Crispy Parmesan Chicken Tenders!
Tips & Tricks
Achieving the Crispiest Texture
To get the crispiest texture, use panko breadcrumbs. Panko provides a light, airy crunch. Make sure to coat the chicken well in the flour mixture first. This helps the cheese and breadcrumbs stick. Lightly spray the tops with olive oil before baking. This gives them a golden finish.
Common Mistakes to Avoid
Don’t skip the buttermilk soak. It adds flavor and moisture. Overcrowding the baking sheet can cause steaming. Leave space between each tender so they cook evenly. Also, avoid using too much flour or cheese. A light coating works best for that crunch.
Recommended Cooking Tools
Use a baking sheet lined with parchment paper. This prevents sticking and makes cleanup easy. A shallow dish for the flour and another for the breadcrumbs helps with coating. A good pair of tongs makes handling the chicken easy. Lastly, an olive oil spray bottle lets you control the amount of oil used.
Variations
Flavorful Seasonings
You can change the taste of your chicken tenders with many seasonings. For a spicy kick, add cayenne pepper or chili powder to the flour mix. If you love herbs, try fresh rosemary or thyme for a fragrant touch. You can also experiment with lemon zest for a bright flavor. Mix and match to find your favorite blend.
Gluten-Free Options
If you need a gluten-free version, use gluten-free flour instead of regular flour. You can also swap panko breadcrumbs with crushed gluten-free crackers or cornflakes. These options still give you that crunchy texture. Just make sure all your ingredients are certified gluten-free to avoid any issues.
Meal Prep and Freezing Ideas
Meal prep makes weeknight dinners easy. You can bread the chicken tenders in advance and freeze them. Lay them flat on a baking sheet first, then freeze until solid. After that, transfer them to a bag. When ready to cook, bake them right from the freezer. Just add a few extra minutes to the cooking time. This way, you always have a tasty meal on hand!
Storage Info
Proper Storage Techniques
After cooking your oven-baked crispy Parmesan chicken tenders, you want to store them right. Let them cool down to room temperature first. Then, place them in an airtight container. If you have some leftovers, keep them safe from air and moisture. You can also wrap them tightly in plastic wrap and then place them in a container. This way, they stay fresh longer.
Reheating Instructions
To reheat the chicken tenders, I suggest using the oven. Preheat your oven to 375°F (190°C). Place the chicken tenders on a baking sheet. Heat them for about 10-15 minutes until they’re hot and crispy again. If you want to use a microwave, it’s best to cover them with a damp paper towel. This helps keep them moist. However, the oven will keep them crispier.
Shelf Life
These chicken tenders can last in the fridge for about 3-4 days. If you want to store them longer, consider freezing them. In the freezer, they can last for up to 2 months. Just be sure to wrap them well to avoid freezer burn. When you’re ready to eat, thaw them in the fridge overnight before reheating.
FAQs
Can I use chicken breasts instead of tenders?
Yes, you can use chicken breasts. Just slice them into strips. The cooking time may change. Thicker pieces will need more time in the oven. Aim for strips that are about the same size as tenders. This helps them cook evenly.
How do I know when the chicken is cooked through?
To check if the chicken is done, use a meat thermometer. Insert it into the thickest part of the chicken. The safe internal temperature is 165°F (74°C). If you don’t have a thermometer, cut into a piece. The meat should be white and juices should run clear.
What dipping sauces pair well with chicken tenders?
Many sauces go well with chicken tenders. Here are some favorites:
– Barbecue sauce
– Honey mustard
– Ranch dressing
– Marinara sauce
– Buffalo sauce
Feel free to mix and match to find your favorite. Enjoy the crispy flavors with your favorite dips!
This blog post covered how to make tasty chicken tenders from start to finish. We looked at ingredients, prep steps, and cooking methods. I shared tips for getting that perfect crispy texture and avoiding common mistakes. You also learned variations to boost flavor and storage techniques.
Now, you are ready to impress with your chicken tender skills! Enjoy cooking and experimenting. Your tasty tenders await!

