Easter Chicks Cupcakes Delightful Spring Treat

WANT TO SAVE THIS RECIPE?

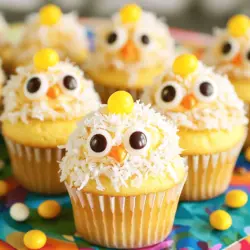
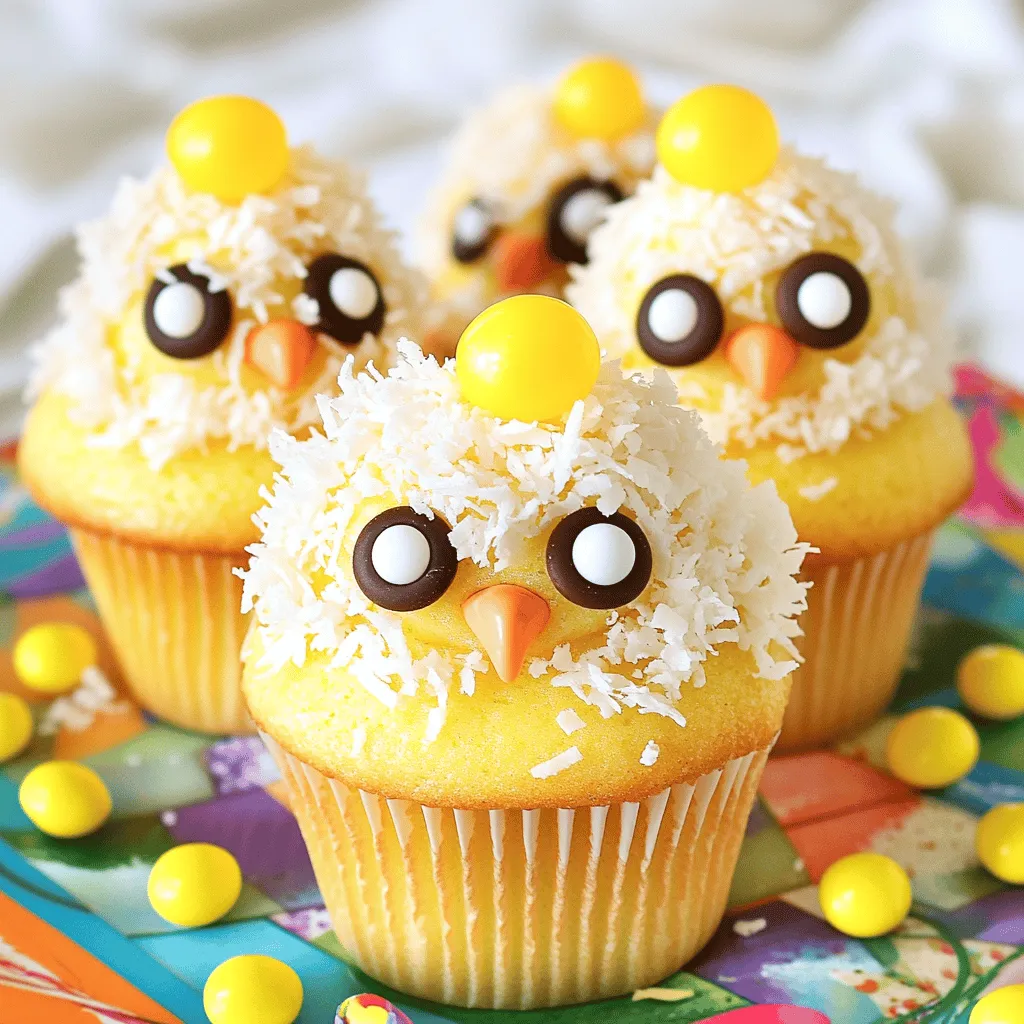
Are you ready to bake a fun spring treat that will wow everyone? Easter Chicks Cupcakes are not just sweet; they’re a delight! These cute, fluffy cupcakes are perfect for your holiday table or just for fun. In this guide, I’ll share a full recipe, step-by-step instructions, and tips to help you create the best cupcakes ever. Let’s jump into the joy of baking!

Ingredients

Full Recipe Overview

To make Easter chicks cupcakes, you need simple ingredients. This fun recipe creates 12 yummy cupcakes. Each cupcake is cute and perfect for spring.

Essential Baking Ingredients

Here is a list of the main baking ingredients you will need:

– 1 ¾ cups all-purpose flour

– 1 ½ teaspoons baking powder

– ½ teaspoon baking soda

– ¼ teaspoon salt

– ½ cup unsalted butter, softened

– 1 cup granulated sugar

– 2 large eggs

– 2 teaspoons vanilla extract

– 1 cup buttermilk

– Yellow food coloring

These ingredients create a soft and moist cupcake that everyone will love.

Decor Elements and Toppings

Now, let’s add some fun decorations. Here are the items you will need:

– 1 cup buttercream frosting (store-bought or homemade)

– ½ cup shredded coconut

– Candy eyes

– Mini chocolate chips

– Yellow jelly beans (for decoration)

These toppings help make your cupcakes look like little chicks. The coconut gives a fuzzy look, while the jelly beans add a fun hat. Enjoy the process of decorating; it’s where your creativity shines!

Step-by-Step Instructions

Preparing the Cupcake Batter

To start, preheat your oven to 350°F (175°C). Line a cupcake pan with paper liners. In a medium bowl, whisk together the flour, baking powder, baking soda, and salt. Set this mix aside for later. In a large mixing bowl, beat the softened butter and granulated sugar with an electric mixer. You want it to be light and fluffy, which takes about 3-4 minutes. Now, add the eggs one at a time, mixing well after each. Stir in the vanilla extract next.

Gradually add the dry mix and buttermilk to the butter mixture. Start and end with the dry mix. Mix until just combined. Now, add a few drops of yellow food coloring and stir until you reach the shade you like.

Baking the Cupcakes

Once your batter is ready, fill each cupcake liner about two-thirds full. Bake the cupcakes in your preheated oven for 18-20 minutes. To check if they are done, insert a toothpick in the center. If it comes out clean, they are ready. Allow the cupcakes to cool completely on a wire rack before frosting. This step is key, as hot cupcakes can melt the frosting.

Frosting and Decorating the Cupcakes

While the cupcakes cool, prepare the buttercream frosting. You can either make it from scratch or use store-bought frosting. Once the cupcakes are cool, spread a generous layer of frosting on each one. Next, press shredded coconut onto the frosting to create a soft, fuzzy look.

Now comes the fun part! Use the buttercream to attach candy eyes and mini chocolate chips to create the chick’s face. For an extra cute touch, place a yellow jelly bean on top as a little hat. These steps transform simple cupcakes into delightful Easter chicks. To see the full recipe, check out the details above.

Tips & Tricks

Perfecting Your Cupcake Texture

To get soft and fluffy cupcakes, use room-temperature ingredients. This allows the butter and sugar to blend better. Mix until just combined to avoid dense cupcakes. Over-mixing can lead to tough texture. Always measure your flour correctly to prevent dry batter. Use a kitchen scale for accuracy if you can.

Decorating Techniques for Easter Chicks

For the cutest chicks, spread frosting thickly. Use a spatula to create a smooth surface. Press shredded coconut into the frosting for a fuzzy look. Place candy eyes carefully to give each chick personality. Add mini chocolate chips for the beak. Finish with a yellow jelly bean on top as a fun hat.

Common Mistakes to Avoid

One common mistake is not cooling cupcakes fully before frosting. This can melt the frosting and make it runny. Another mistake is skipping the food coloring. It adds a festive touch that makes all the difference. Also, be cautious with the coconut. Too much can hide your cute chicks!

For the Full Recipe, check back for the detailed steps to make these adorable Easter Chicks Cupcakes. Enjoy your baking!

Variations

Gluten-Free Easter Chicks Cupcakes

You can make gluten-free Easter chicks cupcakes using gluten-free flour. Simply swap all-purpose flour for a gluten-free blend. This change helps keep the texture light and fluffy. Ensure your baking powder is gluten-free, too. Follow the rest of the recipe as is. These gluten-free treats will still be fun and tasty.

Vegan-Friendly Cupcake Options

To create vegan-friendly cupcakes, replace eggs with flax eggs. Mix one tablespoon of ground flaxseed with three tablespoons of water. Let it sit for a few minutes until it thickens. Use plant-based butter and non-dairy milk instead of regular butter and buttermilk. This will keep the cupcakes moist and delicious. They’ll still look like cheerful chicks!

Alternative Frosting Ideas

If you want a twist on the frosting, try using cream cheese frosting. It adds a tangy flavor that pairs well with the sweetness. For a lighter option, consider whipped coconut cream. This will give a fluffy texture and a hint of coconut flavor. You can also add colors to your frosting for a fun look. Each variation can give your Easter chicks cupcakes a unique taste and style. For the full recipe, check the earlier sections.

Storage Info

How to Store Leftover Cupcakes

To keep your Easter Chicks Cupcakes fresh, place them in an airtight container. Make sure the cupcakes are fully cooled before you store them. If they are not cooled, condensation can form and make them soggy. You can keep them at room temperature for up to three days. If you want to save them longer, consider freezing.

Freezing Instructions

Freezing cupcakes is easy and effective. First, wrap each cupcake tightly in plastic wrap to prevent freezer burn. Then, place them in a freezer-safe bag or container. You can freeze these cupcakes for up to three months. When you are ready to enjoy them, let them thaw in the fridge overnight.

Best Practices for Maintaining Freshness

For the best taste, only frost what you will eat right away. Frosting can lose its texture over time. If you have leftover frosting, store it in a separate airtight container. You can keep it in the fridge for up to one week. To refresh the frosting, just give it a quick stir before using it again.

FAQs

Can I make the cupcake batter ahead of time?

Yes, you can make the batter ahead. Store it in the fridge for up to 24 hours. Just cover it well in a bowl or a bag. When you’re ready, bring it to room temp before baking. This helps the cupcakes rise nicely.

What can I substitute for buttermilk?

If you don’t have buttermilk, no problem! You can use plain yogurt or sour cream mixed with water. Mix one cup of yogurt with a little water until it’s smooth. You can also mix milk with vinegar or lemon juice. Use one cup of milk and add one tablespoon of vinegar, then let it sit for five minutes.

How long do these cupcakes last?

These cupcakes stay fresh for about three days at room temperature. Keep them in a covered container to help them last. If you want them to last longer, put them in the fridge for up to a week. Just remember, the frosting may not be as fresh after that.

Can I use other colors for decorating?

Absolutely! You can use any colors you like for decorating. Just switch up the food coloring to create fun and bright chicks. Use pastel colors for a softer look, or go bold with bright shades. Let your creativity shine during this festive time!

You now have all you need to bake delicious Easter Chick Cupcakes. We covered key ingredients, step-by-step instructions, and helpful tips. Remember, perfect texture and fun decorations will impress everyone. Explore tasty variations like gluten-free and vegan options. Store your treats right to keep them fresh. Don’t hesitate to try new flavors and colors. Baking should be fun, so enjoy every moment of it! Happy baking, and may your cupcakes bring joy to all!

To make Easter chicks cupcakes, you need simple ingredients. This fun recipe creates 12 yummy cupcakes. Each cupcake is cute and perfect for spring. Here is a list of the main baking ingredients you will need: - 1 ¾ cups all-purpose flour - 1 ½ teaspoons baking powder - ½ teaspoon baking soda - ¼ teaspoon salt - ½ cup unsalted butter, softened - 1 cup granulated sugar - 2 large eggs - 2 teaspoons vanilla extract - 1 cup buttermilk - Yellow food coloring These ingredients create a soft and moist cupcake that everyone will love. Now, let's add some fun decorations. Here are the items you will need: - 1 cup buttercream frosting (store-bought or homemade) - ½ cup shredded coconut - Candy eyes - Mini chocolate chips - Yellow jelly beans (for decoration) These toppings help make your cupcakes look like little chicks. The coconut gives a fuzzy look, while the jelly beans add a fun hat. Enjoy the process of decorating; it’s where your creativity shines! To start, preheat your oven to 350°F (175°C). Line a cupcake pan with paper liners. In a medium bowl, whisk together the flour, baking powder, baking soda, and salt. Set this mix aside for later. In a large mixing bowl, beat the softened butter and granulated sugar with an electric mixer. You want it to be light and fluffy, which takes about 3-4 minutes. Now, add the eggs one at a time, mixing well after each. Stir in the vanilla extract next. Gradually add the dry mix and buttermilk to the butter mixture. Start and end with the dry mix. Mix until just combined. Now, add a few drops of yellow food coloring and stir until you reach the shade you like. Once your batter is ready, fill each cupcake liner about two-thirds full. Bake the cupcakes in your preheated oven for 18-20 minutes. To check if they are done, insert a toothpick in the center. If it comes out clean, they are ready. Allow the cupcakes to cool completely on a wire rack before frosting. This step is key, as hot cupcakes can melt the frosting. While the cupcakes cool, prepare the buttercream frosting. You can either make it from scratch or use store-bought frosting. Once the cupcakes are cool, spread a generous layer of frosting on each one. Next, press shredded coconut onto the frosting to create a soft, fuzzy look. Now comes the fun part! Use the buttercream to attach candy eyes and mini chocolate chips to create the chick's face. For an extra cute touch, place a yellow jelly bean on top as a little hat. These steps transform simple cupcakes into delightful Easter chicks. To see the full recipe, check out the details above. To get soft and fluffy cupcakes, use room-temperature ingredients. This allows the butter and sugar to blend better. Mix until just combined to avoid dense cupcakes. Over-mixing can lead to tough texture. Always measure your flour correctly to prevent dry batter. Use a kitchen scale for accuracy if you can. For the cutest chicks, spread frosting thickly. Use a spatula to create a smooth surface. Press shredded coconut into the frosting for a fuzzy look. Place candy eyes carefully to give each chick personality. Add mini chocolate chips for the beak. Finish with a yellow jelly bean on top as a fun hat. One common mistake is not cooling cupcakes fully before frosting. This can melt the frosting and make it runny. Another mistake is skipping the food coloring. It adds a festive touch that makes all the difference. Also, be cautious with the coconut. Too much can hide your cute chicks! For the Full Recipe, check back for the detailed steps to make these adorable Easter Chicks Cupcakes. Enjoy your baking! {{image_2}} You can make gluten-free Easter chicks cupcakes using gluten-free flour. Simply swap all-purpose flour for a gluten-free blend. This change helps keep the texture light and fluffy. Ensure your baking powder is gluten-free, too. Follow the rest of the recipe as is. These gluten-free treats will still be fun and tasty. To create vegan-friendly cupcakes, replace eggs with flax eggs. Mix one tablespoon of ground flaxseed with three tablespoons of water. Let it sit for a few minutes until it thickens. Use plant-based butter and non-dairy milk instead of regular butter and buttermilk. This will keep the cupcakes moist and delicious. They’ll still look like cheerful chicks! If you want a twist on the frosting, try using cream cheese frosting. It adds a tangy flavor that pairs well with the sweetness. For a lighter option, consider whipped coconut cream. This will give a fluffy texture and a hint of coconut flavor. You can also add colors to your frosting for a fun look. Each variation can give your Easter chicks cupcakes a unique taste and style. For the full recipe, check the earlier sections. To keep your Easter Chicks Cupcakes fresh, place them in an airtight container. Make sure the cupcakes are fully cooled before you store them. If they are not cooled, condensation can form and make them soggy. You can keep them at room temperature for up to three days. If you want to save them longer, consider freezing. Freezing cupcakes is easy and effective. First, wrap each cupcake tightly in plastic wrap to prevent freezer burn. Then, place them in a freezer-safe bag or container. You can freeze these cupcakes for up to three months. When you are ready to enjoy them, let them thaw in the fridge overnight. For the best taste, only frost what you will eat right away. Frosting can lose its texture over time. If you have leftover frosting, store it in a separate airtight container. You can keep it in the fridge for up to one week. To refresh the frosting, just give it a quick stir before using it again. Yes, you can make the batter ahead. Store it in the fridge for up to 24 hours. Just cover it well in a bowl or a bag. When you're ready, bring it to room temp before baking. This helps the cupcakes rise nicely. If you don't have buttermilk, no problem! You can use plain yogurt or sour cream mixed with water. Mix one cup of yogurt with a little water until it's smooth. You can also mix milk with vinegar or lemon juice. Use one cup of milk and add one tablespoon of vinegar, then let it sit for five minutes. These cupcakes stay fresh for about three days at room temperature. Keep them in a covered container to help them last. If you want them to last longer, put them in the fridge for up to a week. Just remember, the frosting may not be as fresh after that. Absolutely! You can use any colors you like for decorating. Just switch up the food coloring to create fun and bright chicks. Use pastel colors for a softer look, or go bold with bright shades. Let your creativity shine during this festive time! You now have all you need to bake delicious Easter Chick Cupcakes. We covered key ingredients, step-by-step instructions, and helpful tips. Remember, perfect texture and fun decorations will impress everyone. Explore tasty variations like gluten-free and vegan options. Store your treats right to keep them fresh. Don’t hesitate to try new flavors and colors. Baking should be fun, so enjoy every moment of it! Happy baking, and may your cupcakes bring joy to all!

Easter Chicks Cupcakes

Bring some fun to your spring baking with these delightful Easter Chicks Cupcakes! This cute and easy recipe is perfect for the holiday or any festive occasion. Discover step-by-step instructions, essential ingredients, and creative decorating ideas to make your cupcakes look like adorable chicks. Don't miss out on impressing your friends and family, click through to explore the full recipe and let your baking adventure begin!

Ingredients
  

1 ¾ cups all-purpose flour

1 ½ teaspoons baking powder

½ teaspoon baking soda

¼ teaspoon salt

½ cup unsalted butter, softened

1 cup granulated sugar

2 large eggs

2 teaspoons vanilla extract

1 cup buttermilk

Yellow food coloring

1 cup buttercream frosting (store-bought or homemade)

½ cup shredded coconut

Candy eyes

Mini chocolate chips

Yellow jelly beans (for decoration)

Instructions
 

Preheat your oven to 350°F (175°C) and line a cupcake pan with paper liners.

    In a medium bowl, whisk together the flour, baking powder, baking soda, and salt. Set aside.

      In a large mixing bowl, beat the softened butter and granulated sugar with an electric mixer until light and fluffy, about 3-4 minutes.

        Add the eggs one at a time, mixing well after each addition. Stir in the vanilla extract.

          Gradually alternate adding the dry ingredients and buttermilk to the butter mixture, starting and ending with the dry ingredients. Mix until just combined.

            Add a few drops of yellow food coloring and mix until the batter reaches the desired shade of yellow.

              Fill each cupcake liner about two-thirds full with the batter.

                Bake in the preheated oven for 18-20 minutes, or until a toothpick inserted in the center comes out clean. Allow cupcakes to cool completely on a wire rack.

                  While the cupcakes cool, prepare the buttercream frosting (if making from scratch) or use store-bought frosting.

                    Once the cupcakes are cool, spread a generous layer of frosting on top of each cupcake.

                      Gently press shredded coconut onto the frosting to create a “fuzzy” appearance.

                        Using the buttercream, attach candy eyes and mini chocolate chips to resemble the chick's face.

                          Place a yellow jelly bean on top of the frosting as a cute chick hat for an extra fun touch.

                            Prep Time: 20 minutes | Total Time: 1 hour | Servings: 12 cupcakes

                              - Presentation Tips: Arrange the cupcakes on a festive platter and sprinkle additional coconut around to resemble a nest for a charming Easter display.

                                WANT TO SAVE THIS RECIPE?

                                Leave a Comment

                                Recipe Rating